Aluminum – Chrome 70 Mustang Brackets

As  I start gathering the different parts for all the new mods for my ’70 Mustang one thing I’m sure of is that I want a little more ‘bling” under the hood.  I think the Ford blue engine paint with the brushed nickel look of the current intake need something to offset that color scheme.  I’d like to do most of the brackets for the power steering, alternator, and ac compressor all in chrome. However that’s not going to be possible, if I rely on aftermarket/stock suppliers, as most of my brackets are custom-made. (That’s what you get when you keep the 6 cylinder components when you do a conversion to an 8 cylinder.)  So I’m going to make do with what I can find and the rest will remain iron.

Now with the cost of all this mods looming on the horizon and having less than the average budget, I’m trying to upgrade at least the tension portions of the  Alternator, A/C and the power steering to chrome.  My goal is to replace them with heim joints w/adjustable rods between them.  These are not inexpensive and often require some modification.

So in the pursuit of this end I purchased a kit from Summit Racing for my alternator. This was an all aluminum kit and only advertised as being for a ‘stock” 302 engine.  So going in I knew that it might not work at all.  This turned out to be correct except for the heim joints and the threaded aluminum rod.

So I going to use those for the tension rod for the alternator. However, it wasn’t chrome and had a very heavy coding to make it look like brushed nickel.  The goal for this pieces was to polish it up and see how “bling” like it could look.  This would be a series of repeated sanding, buffing and polishing.

I used my Dremel, sanding disks and buffing and polishing wheel, 200 and 600 grit sand paper and Purple Metal polish, cotton rag (ok..fine it was an old t-shirt) and a vice.

Dremel buffing while and 160 grit sanding disc

Now the 160 grit disk might have been a bit much but the coating was pretty tough and the disc made quick work but did leave a few marks on the test sample that might have causes a bit more work with the lighter grits.

This is actually purple in color and gritty like rubbing compound.

In short the process started with hitting the test piece (one of the stock bracket parts that wouldn’t fit) with the 160 grit disk via the Dremel.  Next I ran the 220 grit sandpaper (by hand) over the aluminum and then the 600 grit and then with the buffing/polishing wheel via the Dremel with a coating of the Purple metal polish.  I switched it up by using some metal polish with the 600 grit sandpaper.

It took a lot of elbow grease and a couple of hours.  Here is what the test piece looks like. You can see the aluminum w/coating and polished portion.

Chrome? Absolutely as shining as chrome.

Now there are some in perfections in the aluminum and if not being careful with the sanding you can leave gouges but generally you can get this type of shine and it looks very close to chrome without the cost, just some elbow grease.

Next will be the polishing of the actual rod that will connect the two heim joints (they are already polished steel).  (I’ve already started, but you won’t see it until it complete.)


Heim joint on one end and the aluminum rod.

Thanks for reading.

Tim


Nearly Live Goodguys Car Show

Coming up in about 60 minutes, Nearly Live – images from the Goodguys Car Show in Scottsdale Az.

Thanks for reading.

Tim
Nearly Live 71 Cheyenne

image

image

image

image

Something about this Chevy pickup I like.

Nearly Live 1978 Contential Diamond Jubilee Edition

image

You know you would own one!!

Nearly Live 1965 Fairlane 500

image

image

Yeah. It’s a 4 Door 500 with a 289!!!

Nearly Live Home Built

image

image

image

image

image

BMW never thought of this.

Car Show – All Fords Mustang Wagon?

So I left a couple of photos out of the last post.  But I wanted to show (IMHO) a couple stars of the show and one of the strange one.

I covered the Galaxies and 500’s, however, here are a couple more:  (Come..on..you would be able to pick just one or two either!!!)

(In no particular order)

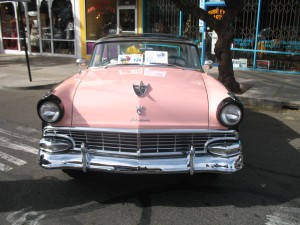
Crown Victorian (before the exploding gas tanks and cop lights)

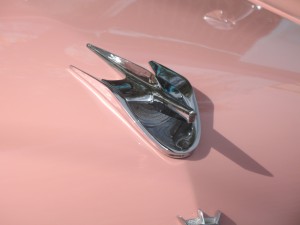
Oh..the Chrome!!

Did I mention the Chrome?

Just look at that smile..I mean bumper!!!

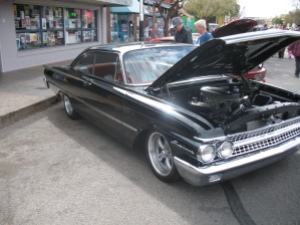
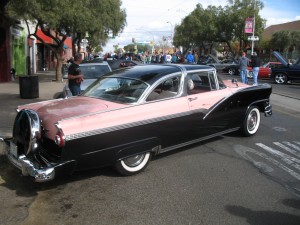
Not really comparable to the Crown Vic – this Starliner was, although not original, very nicely done.

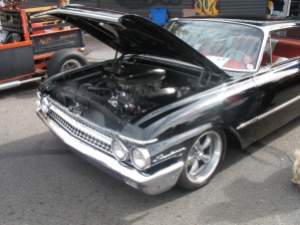
Ford Starliner with a little custom work.


Oh..check out the intake setup on that Starliner!!!!

OK.. I know at least one of my readers will like this next car.

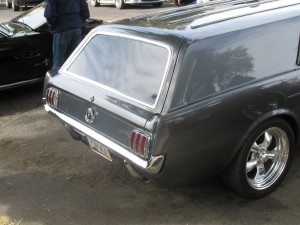
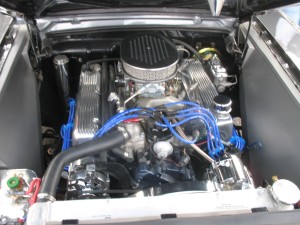
It is a 1965 Ford Mustang Station Wagon.  Originally a concept created by William Sibo (designer for Ford Motor Company).  He actually built this car from the original drawings.  Car is currently owned by Ken Berger.  The car now has a 429, rack and pinion steering C-6 auto trans, coil over suspension and power  brakes, A/C and stereo system.

No Middle Road - Hate it or Love it.

There you go!

I can’t get past the that rear end….but this helps:

429 with that set up?...That 'ill haul wagon!

Thanks for reading.

Tim

New Race Team in the Racing Corner – M & H Tractor Motorsport

Check out our current featured racing team in Average Guy’s Car Restoration, Mods and Racing’s Racing Corner.

Tim Gilson and M & H Tractor Motorsports

Link is at the top of the page:

http://timsweet.wordpress.com/racing-corner-3-tim-gilson-and-m-h-tractor-motorsport/

Wrenchin’ Tip – Fuel Delivery

Here the first Wrenchin’ Tip for 2011.

When installing a new engine or even modifying your present power plant fuel and intake system you have a few things to consider.

Of course the size of your fuel pump, where it and the fuel filter is located, size of the filter, size of your fuel line, fuel pressure.  Along with that jet size or injector size and baffling in your fuel tank.  All of this is important to ensure your fuel delivery system can maintain full pressure at peak engine horsepower in high gear.

All of these need to be adjusted or “sized” to accommodate less controllable factors such as Altitude, air temperature and idiosyncracies of your fuel, like quality and octane rating.  Yes even specific gravity of your gas can effect the jetting.

Here are some jetting requirement of a 750 CFM 4 barrel Holley for specific fuel, temps and altitude options:

Octane                 Temp.            Altitude      Front Jetting      Rear Jetting

  94                        80F                 0 ft                   81                       86

110 Race              80F                  0 ft                 81                       83

94                          80F                3000 ft           76                      81

94                          80F                6000 ft           73                      77

94                          40F                0 ft                 84                      89

94                         120F               0 ft                 78                      83

Oxgenated fuels toss another factor in to be considered when determining your jetting requirements.

Studies of shown that every 1 point richer in air/fuel ratio equals only a few percent less power.  Running the engine as lean as possible will increase your power but also increased combustion chamber temp, which can damage your engine.

Thanks for reading

Tim

Auto Factoid 2011-2 Chevy Engines

1965 – 1966  Chevy’s mainstay V8 the 283 was used in several Studebaker models build in Canada.


1966 Studebaker Cruiser

1966 Studebaker with Chevy’s 283

Chris-Craft boat manufacturer used the 283 in their water boats.


Marine 283 for Chris Craft Cavalier Cruiser

Chris-Craft Used Chevy’s 283

Thanks for reading.

Tim