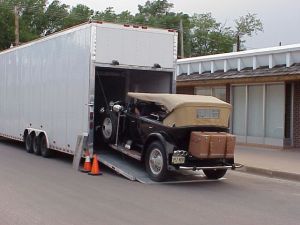
There’s really no telling what banished this half-finished project to a curb full of weeds. It may have been funds running out, a builder in over his head or just a plain lack of interest but either way, we’ll never know. We spied the primered 1939 Packard sedan in northern Illinois, not far from the Wisconsin border. The vehicle’s interior was completely gutted and a single strap appeared to be the only thing holding the hood of an empty engine bay together. Bodywork has been done on several of the fenders and there’s air in the tires, so we’ll hope that whoever owns this dejected cruiser is just taking a break from a restoration or overhaul. Perhaps the next time we roll through the area we’ll see this curvacious Packard back in road-going glory. Or at least a ‘For Sale’ sign in the window.
As you as in the Part 1 we ran into some issue with the clue holding on some critical parts of the door panel, like the part that holds up on sub-panel that holds the controls for the window, locks and mirror remote. Also needing attention was the vent channel that push air to driver’s window to defog it.
I wanted this fixes to be permanent and it was clear that more glue wasn’t going be a long-term fix. There isn’t much that makes up the door panel, it was only about 1/4″ thick. Now I know it might make folks cringe, but it was necessary, I used very small (short) hobby screw.
Here are some pics:
This first pic is showing the actual problems.
The two “A”s are showing the two clips on the back of the brace that accept the male part of the clip from the panel that holds all the controls. Without begin attached the back of the door panel the control flop around and slide out-of-place.
The “B” and arrow highlight the issue. There the glue let go and you can see the gap.
Here you can see the vent channel. This posed a bit of an issue because the door panel is thin here and on the outside there is a locking ring that is mainly a decorative actually had locking prongs, which as a result of the glue no longer holding fast, broke off and I had to JB Weld them back on. In this pic you can see one of the screws I used to put every thing back together.
Here is a close up of the one of the screws. In the lower left you can see on of the blobs of glue that came loose.
This was a really easy repair, however, we didn’t resolve the window issue. So we’ll pull the right side door panel and see if we can fix window issue and as long a we’re in there we’ll shore up the braces.
Some time ago I wrote about repairing my 1984 Corvettes door panel. The panel its self was not well made … read “cheap” and didn’t stand up well to time/use. Unfortunately, I can’t say there was any improvement in “quality” of the door panels in my 2007 Vette. But this project isn’t a Corvette door panel, but my son’s Chrysler LeBaron.
The LeBaron is 1990’s car and the door panels are 1990’s cheap, no nice way to say that. This quick project was didn’t start out about the door panel, other than we had to take it off to check the multiple window control switch. The window controls were part of a plastic insert that also has the remote control for the drivers’ side mirror poked through it. It stays put, normally by 3 prongs that push into “V” clips that are on stand-a-lone braces that are mounted on the door panel directly – but not well done.
Since the insert has slid down over the past few months, it seemed that either driving vibrations and/or normal door operations, so while we are in there we’d push the prong back in. Seemed simple enough.
The back of the panel a fiber board/plastic composite – not really fiberglass but similar and it’s pretty sturdy.
Back side of the door panel.
Here you can see the brackets I mentioned above. However, the way in which the bracket are attached to the board is meant to last forever. They are held together with bits of glue in holes along the edges of the bracket. In the heat of Arizona and the great condition our roads are in (tongue in cheek) this type of connection is not ideal.
Here you can see the glue the back of the bracket and that is oozed out into the holes.
This image below is the results of the glue pulling off – separating from the fiber board.
Part clue – Part fiber board. This was laying at the bottom of the door panel
I re-posted a discussion on “Would You Take A Viper Over A ZR1?” (http://wp.me/pKHNM-1nH). To me there is really no discussion to be had. There is absolutely no way I’d select a Dodge Viper for a ZR1. Heck, there’s no way I’d select a Viper over any Corvette (even the ugly, big butted C5’s). Yup, even over the horse power difference.
It is mainly the design. The Viper looks like the it’s either broken in the middle or was two cars shoved together. Check this out?
So here ya go – the curve of the hood and rake of the windshield make he look “bent” at the vertical line drawn on the fender. The bump where the side exhaust starts the bent look. The door is hinged inside what would normally be a fender brake cooling vent. Then notice the back-end – it looks familiar, yes like a Mazda. It really looks like a sports car got been by shoving a Mazda Miata in its trunk.
Now take a look at a 1992 Corvette ZR1.
Let rake in the windshield and the brake vents are as they should be!!! Great lines!!!
Collector for a 1992 Viper vs. the 1992 ZR1 is a little one sided with the Viper about $15k more than the Vette, so for investment purposes the Vipers the one to own.
 There’s really no telling what banished this half-finished project to a curb full of weeds. It may have been funds running out, a builder in over his head or just a plain lack of interest but either way, we’ll never know. We spied the primered 1939 Packard sedan in northern Illinois, not far from the Wisconsin border. The vehicle’s interior was completely gutted and a single strap appeared to be the only thing holding the hood of an empty engine bay together. Bodywork has been done on several of the fenders and there’s air in the tires, so we’ll hope that whoever owns this dejected cruiser is just taking a break from a restoration or overhaul. Perhaps the next time we roll through the area we’ll see this curvacious Packard back in road-going glory. Or at least a ‘For Sale’ sign in the window.
 The two “A”s are showing the two clips on the back of the brace that accept the male part of the clip from the panel that holds all the controls. Without begin attached the back of the door panel the control flop around and slide out-of-place.